
FlowLines quickstart
Select the screens in order, click Connect. Straight and elbow arrows with labels are free and unlimited, so you can draw a whole flow before you decide on Pro.
Install the plugin
- When FlowLines is published, open it on the Figma Community and click Install. Until then it is not yet available.
- Open any Figma Design, FigJam or Figma Slides file.
- Run it from Plugins → FlowLines, or press Cmd/Ctrl + / and type "FlowLines".
Your first flow
- Select the screens in order. Click the first screen, then Shift-click each next one. If you drag a marquee instead, the screens are taken left to right. The top line shows the order, for example "4 layers: Welcome → Sign in → Verify code → Home".
- Check the order. Keep Selection order, or switch to Left to right or Top to bottom.
- Choose how to connect. Each to the next draws a chain. First to all others fans out from the first layer.
- Add a label if you want one, for example "Continue". It sits on a pill at the middle of every arrow drawn in this run.
- Click Connect.
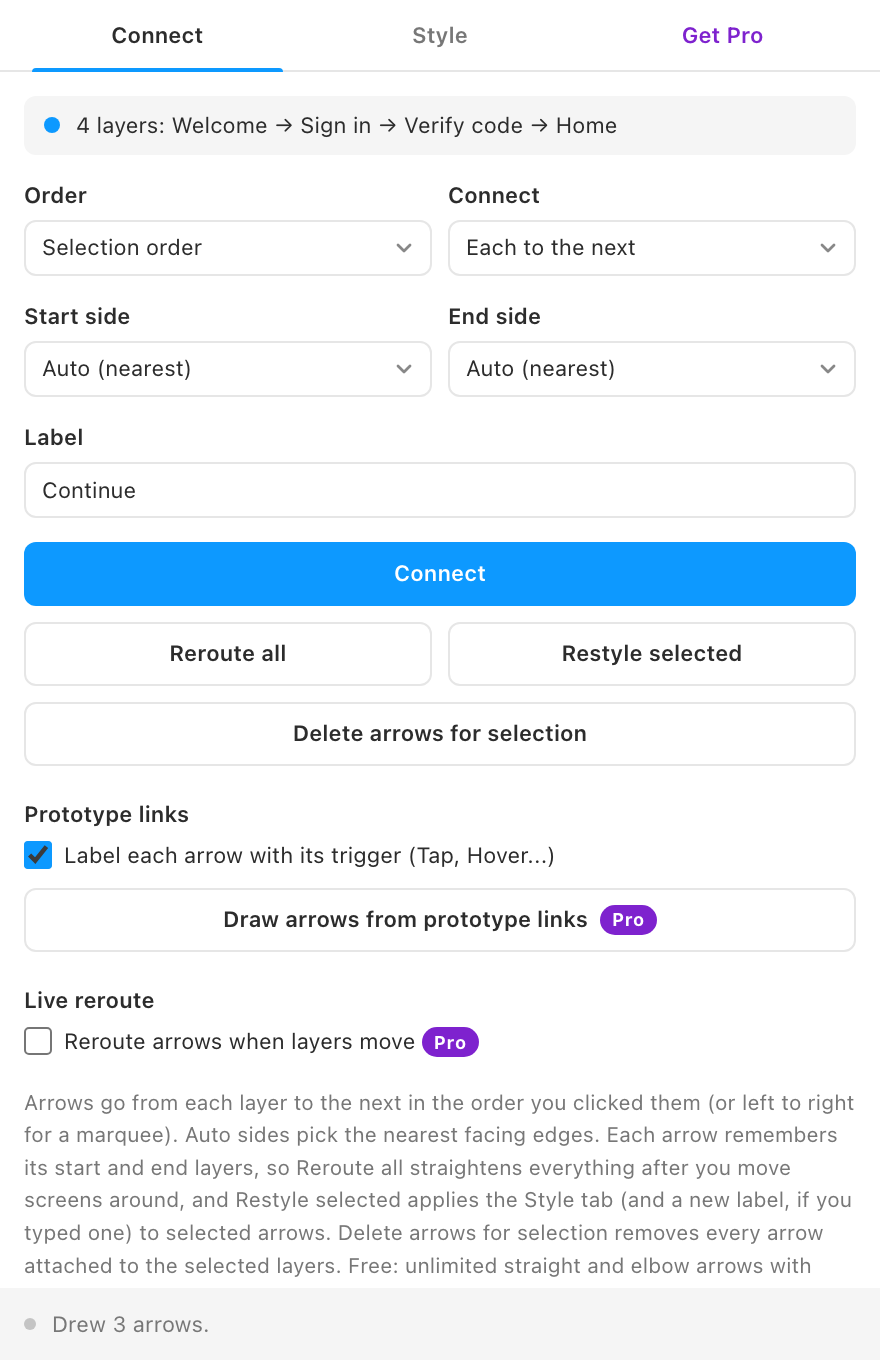
The arrows appear in a group called "FlowLines" on the page, one arrow per pair, named after the layers they join. To change their look, open the Style tab, select the arrows on the canvas, and click Restyle selected.
After you move screens
Click Reroute all. Every FlowLines arrow on the page is redrawn from its stored start and end layers. With Pro, turn on Reroute arrows when layers move and the arrows follow while the plugin window is open.